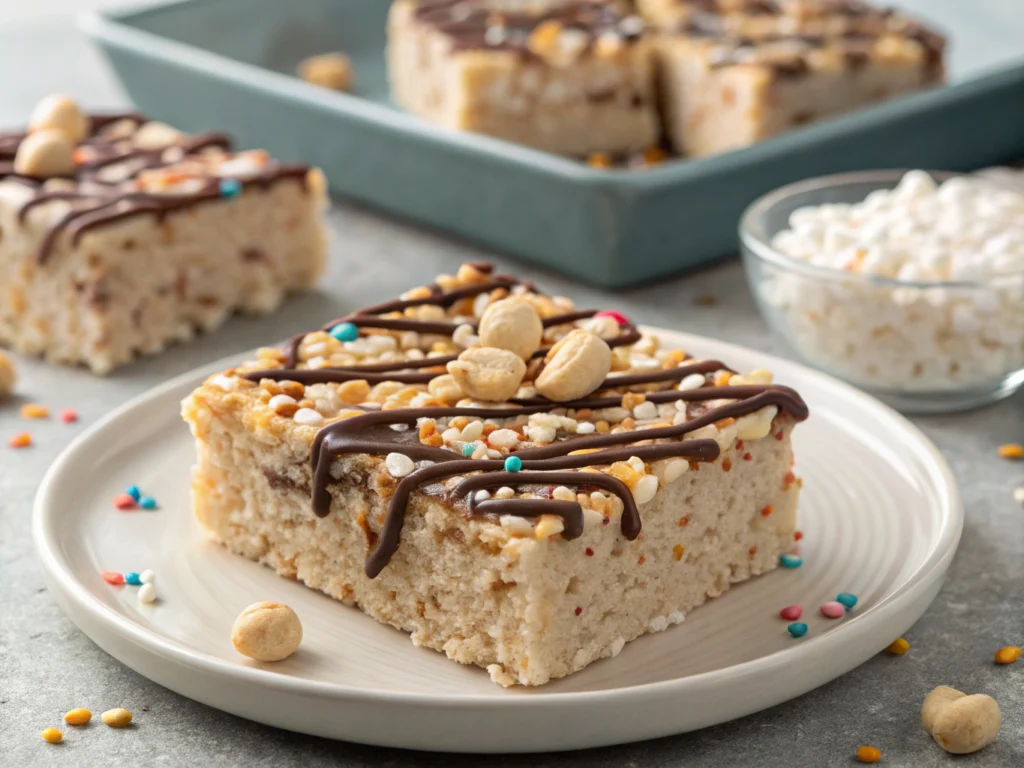
If you’re looking for a quick and easy dessert, this rice krispie treat recipe is a must-try. With just a few simple ingredients, these gooey marshmallow squares are perfect for family gatherings, school events, or a cozy night at home. Plus, the no-bake nature of this recipe makes it a favorite for all ages.
Why This Rice Krispie Treat Recipe Is Perfect for Any Occasion
This rice krispie treat has stood the test of time because it’s so simple yet endlessly versatile. Whether you’re making them as a last-minute dessert or customizing them for a special event, these treats are always a crowd-pleaser.
For more dessert inspiration, check out this collection of easy recipes. Pair your rice krispie treats with something more elegant, like earl grey cookies, for a balanced dessert table.
Ingredients for the Best Rice Krispie Treat Recipe
Creating the perfect rice krispie treat requires the right ingredients and ratios:
- Rice cereal: This provides the essential crunch.
- Mini marshmallows: These make the treats gooey and delicious.
- Unsalted butter: Adds richness and prevents sticking.
- Vanilla extract: Enhances the flavor.
- Salt: Balances the sweetness perfectly.
Step-by-Step Guide to Making This Rice Krispie Treat Recipe
1. Prepare Your Pan
Line a 9×13-inch baking pan with parchment paper and lightly grease it to prevent sticking.
2. Melt the Butter and Marshmallows
In a large pot, melt the butter over medium heat. Add the marshmallows and stir continuously until they melt completely. This step is key to achieving the perfect consistency for your rice krispie treat .
3. Combine Ingredients
Remove the pot from heat, then stir in the vanilla extract and salt. Gradually fold in the rice cereal until the marshmallow mixture evenly coats it.
4. Spread and Set
Transfer the mixture to the prepared pan and gently press it down using a greased spatula. Avoid compacting the mixture too much, as this can make the treats dense.
5. Slice and Serve
Allow the rice krispie treats to cool for at least an hour before slicing them into squares. This final step ensures perfect presentation and texture.

Creative Twists on This Rice Krispie Treat Recipe
This classic rice krispie treat is a fantastic base for creativity. Here are a few ideas to make it your own:
- Chocolate Drizzle: Add a layer of melted chocolate for extra indulgence.
- Peanut Butter Variation: Stir peanut butter into the melted marshmallows for a nutty flavor.
- Festive Additions: Incorporate holiday sprinkles or colorful marshmallows to match the season.
- Elegant Pairing: Serve alongside a slice of pumpkin banana loaf for a unique dessert platter.
Storing and Freezing This Rice Krispie Treat Recipe
Storage Tips
- Keep your rice krispie treats in an airtight container at room temperature for up to three days.
- Use parchment paper between layers to prevent sticking.
Freezing Tips
- Wrap individual squares in plastic wrap, then place them in a freezer-safe container.
- When ready to enjoy, thaw at room temperature for a soft and gooey texture.
FAQs About This Rice Krispie Treat Recipe
What is the best cereal-to-marshmallow ratio?
For this rice krispie treat , a ratio of 9 cups of rice cereal to 20 ounces of marshmallows ensures the perfect balance.
Can I make vegan rice krispie treats?
Yes! Substitute traditional marshmallows with plant-based options and use vegan butter for a dairy-free treat.
Why are my rice krispie treats too hard?
Overheating the marshmallows or pressing the mixture too firmly into the pan can cause this issue. Melt the marshmallows gently and press lightly for best results.
Can I add mix-ins?
Absolutely! Mix in chocolate chips, candy pieces, or chopped nuts to make this rice krispie treat recipe even more exciting.
This rice krispie treat recipe is a versatile and crowd-pleasing dessert that’s perfect for any occasion. Whether you keep it simple or add your own creative twists, these marshmallow squares are guaranteed to impress. Pair them with complementary desserts like earl grey cookies or pumpkin banana loaf to create a dessert spread everyone will love!


